Step-by-Step Guide to Cleaning Inside Window Sills
Window Sills Cleaning: Easy Step-by-Step Guide
Have you ever leaned in to enjoy the view in your window and met a grimy, dusty sill that is staring back at you? Sometimes, people forget about cleaning window sills, but they belong to the number of the first places where dirt, dust, and even mould may appear. Whether it is spilt drinks or entrapment of moisture, all these nooks can be a breeding ground of ugliness and lack of hygiene very soon.
The Silver lining in this is, you do not necessarily need to dread house-cleaning inside of window sills. Cleaning your window sills can be done with some easy-to-find tools and some know-how in a hurry, and your window sills can go from dirty and drab to clean and fresh again. The following are the steps to help you do just that.
1. Know Why the Window Sills are Dirty
It is better to understand the reason that results in dirt on window sills before getting involved in Bond Cleaning Pimpama. Dust in the air lands over time in these holes. Since mould and mildew are present in moist environments, condensation or leaks may provide an environment in which they occur. Dried-up insects, overturned liquids, and pollination also pay a visit there and make it very sure that the crevices are a trash tourist. Knowing about these conditions will give you a better chance to clean and prevent the buildup formation in the future.
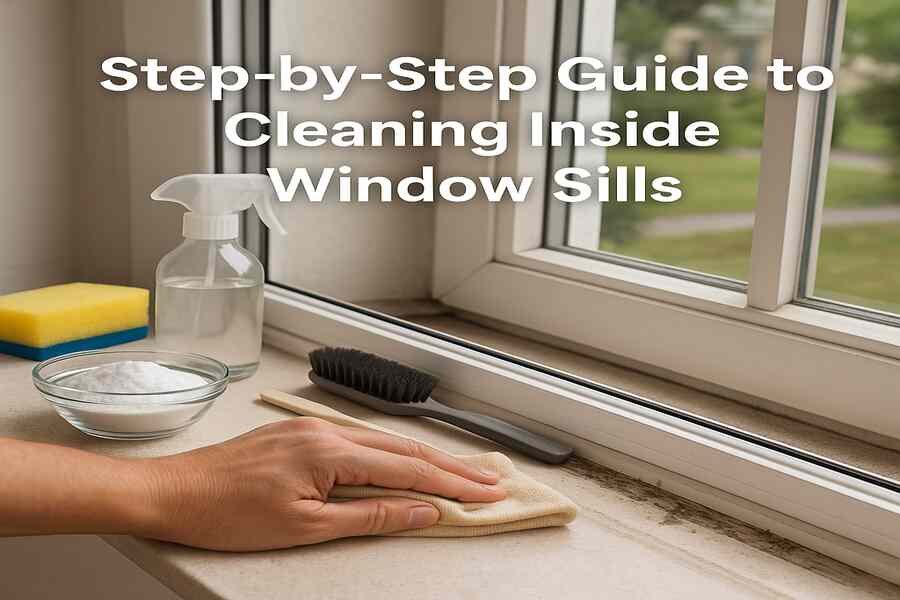
2. Get the Appropriate Cleaning Materials
It does not take too much stuff to clean the windowsill. You will require a vacuum cleaner, a crevice tool, a soft-bristled brush or an old toothbrush, a microfiber cloth, warm soapy water, white vinegar, baking soda, cotton swabs and a small container or bowl. Such products are very soft but effective enough to clean off your windows and sills, dust, sticky substances, and eliminate the mould without harming them.
3. Begin With Dust and Loose Debris
Start by cleaning any areas of loose dirt, dust or debris. Use a crevice tool on the vacuum cleaner to collect as much hidden debris by going into the tight corners. When you do not have a vacuum system, a small brush or even a dry paintbrush may become useful in jostling loose materials. The first layer of dirt removal will ease the further cleaning procedure and will make it very efficient.
4. Loosen Stubborn Dirt with Soapy Water
Wait until the water has cooled, and then, on some absorbent material, moisten a little warm water and a drop or two of weak dish detergent. Use your microfiber cloth to dip into the soapy water, wring it out and wipe down the whole inside of the windowsill. Pay attention to sticky places and stains, pressing with light forces. In corners and other places that are difficult to clean using a cloth, you can use cotton swabs dipped in the soapy solution to scrub the dirt. This step gets rid of much of the noticeable dirtand cleans up the sill, ready to do a thorough cleaning.
5. Baking Soda Deep Cleaning with Vinegar
Accidentally left wet, you can spot mould and mildew, or have some stains that can not be washed out. The combination of baking soda and vinegar is the perfect help in this situation. Sprinkling a little bit of baking soda on the stained region and followed by application of white vinegarton it is the method. You will notice that it is fizzing, and this action assists in lifting the dirt and has antibacterial effects. Immerse it in a 10 15 minute soak and scrub with an old toothbrush or soft brush. Wipe off with a slightly damp cloth to clean up any residues. This is a natural solution that is safe and very potent during deep cleaning.
6. Wash the Tracks and Crevices
The window sill usually contains areas where one can trap dust and pieces of debris. It is difficult to get these areas with a dry cloth, so do it wet: put a cotton swab or a toothbrush into the vinegar mix and run it through the tracks. A small butter knife, which you can cover with a damp cloth, would also be of help to you to reach difficult places. The scrubbed area is then dried by a vacuum cleaner or dry cloth so that the removed particles of dirt and moisture are taken away. Cleaning the tracks is not only beautifying them, but it also cleans the windows of smoothening operations.
7. Dry Sill and Polish
This is because one should ensure that he or she dries the window sill after cleaning. A new piece of microfiber cloth can be used to wick away any remaining moisture. Leaving the area wet may result in mould and water stains. After drying, wooden or painted sills may be polished with a minute bit of furniture polish or with a natural oil such as lemon oil to regain the gloss and also provide protective cover.
8. Stop Future Accumulation
Follow some prevention strategies to make the cleanup of your window sills last longer. Cleaning the sills must be done regularly, that is, once a week, which involves routinely dusting and vacuum cleaning the sills. As quickly as you can, seal leaking windows to prevent water damage and the development of mould. Clear wax or a protective sealant may also be put on the wooden sills after a very light application. This resin will help clean up in the future. Harmless little practices, such as the need to keep the surfaces of condensation after having bad wet days, could be very helpful in keeping the window sills clean.
Conclusion
It might not seem like something important to clean the inside of window sills, but it can make anything feel much better and also make the home healthier to live in. When the proper tools and methods are employed, it will be easy to clear out the dust, grime and the mould that are present on the windows so they will be left clean.
This is the most important bit; a beater-up every week or two or three is what you want to avoid the build-up of, to make molly-coddling that much easier. That when you sit down to enjoy the breeze on your window, you will have a mind that the sills under are as clean and beautiful as what is outside.
Related Posts
Seven Unclean Kitchen Items You Haven’t Been Cleaning
Unclean Kitchen Items You Miss Cleaning Believe your kitchen is clean? Do you know if…

Ten Ways Your Bathroom Cleaning Is Wrong
10 Ways Your Bathroom Cleaning Is Wrong Are you sure your bathroom is a squeaky-clean…

An All-Inclusive Guide to Home Upholstery Cleaning
Home Upholstery Cleaning Guide – Easy & Safe Methods Have you ever collapsed into an…